Installing ConnectedRoom OS
Written By Guillaume
Last updated 26 days ago
This guide walks you through the complete installation of ConnectedRoom OS onto your device, from downloading the image to connecting to Wi-Fi for the first time.
Before you start
ConnectedRoom OS is destructive and replaces anything that is on the device you are installing it on. Make sure you are okay with wiping the device you plan on using for it. There is no dual-boot option. To revert, you will need to reformat to Windows or any previous OS you were using before.
Step 1 — Download the Image File
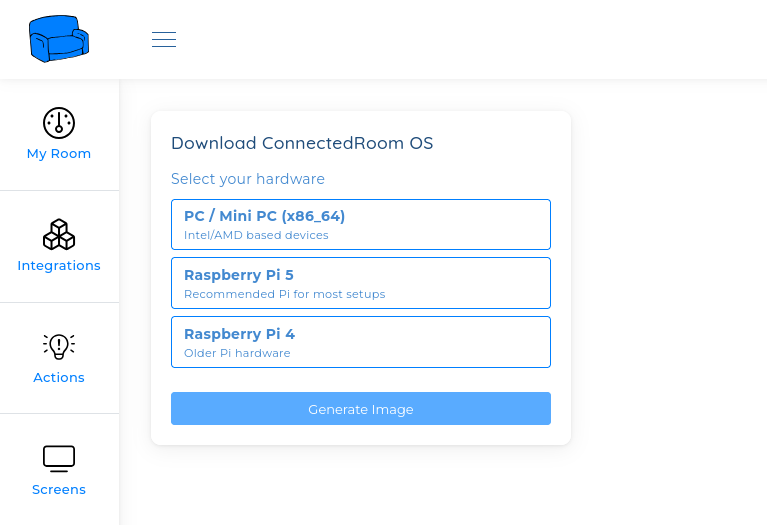
Go to the ConnectedRoom OS downloads page and download the latest .img.gz image file to your computer. Take note of where the file is saved — you'll need it in the next step.
Step 2 — Flash the Image
You'll use BalenaEtcher to write the ConnectedRoom OS image onto your storage media.

Download and install BalenaEtcher if you haven't already.
Right-click BalenaEtcher and choose "Run as administrator" — this is required for the flash to complete correctly.
Click Flash from file and select the
.img.gzfile you downloaded.Click Select target and choose your USB key or SD card. Double-check you've selected the right drive.
Click Flash! and wait for the process to complete.
⚠️ All data on the selected USB key or SD card will be erased. Make sure there's nothing important on it before flashing.
Step 3 — Disable Fast Boot and Secure Boot in BIOS (PC only)
💡 This step applies to PCs and Mini PCs only. Skip to Step 4b if you are installing on a Raspberry Pi.
Before booting from the USB key, you need to adjust two settings in your computer's BIOS/UEFI to ensure compatibility with ConnectedRoom OS.
Restart your computer and press the BIOS key during startup — typically F2, F10, F12, or DEL depending on your manufacturer.
Navigate to the Boot settings and disable Fast Boot.
Navigate to the Security settings and disable Secure Boot.
Save your changes and exit the BIOS (usually F10 to save and exit).
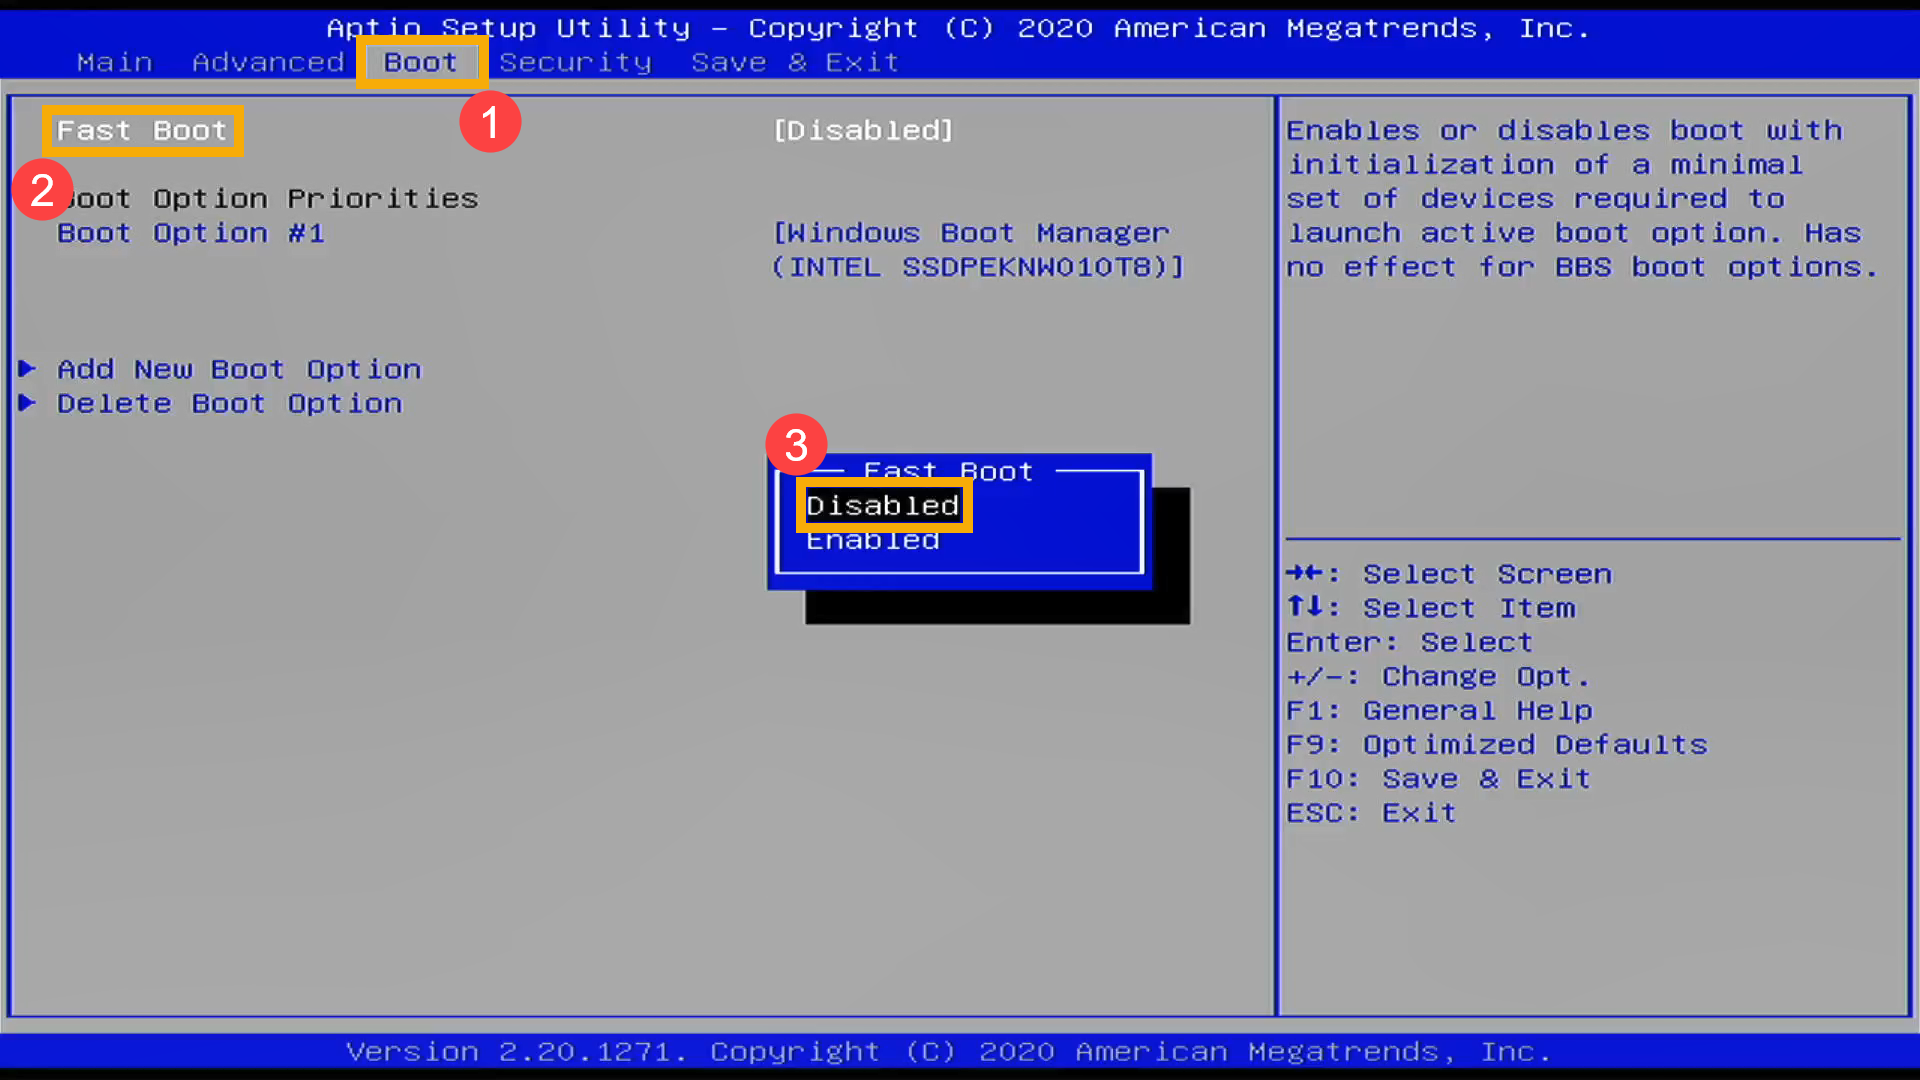
💡 The exact menu names and locations vary by manufacturer. Refer to your motherboard or laptop manual if you're unsure.
Step 4a — Boot from the USB Key (PC)
💡 This step applies to PCs and Mini PCs only. See Step 4b below for Raspberry Pi.
With your flashed USB key plugged in, restart your computer and boot from it.
Restart your computer with the USB key inserted.
Press the boot menu key during startup (commonly F8, F11, or F12) to open the one-time boot menu.
Select your USB key from the list and press Enter.
Step 4b — Boot from the SD Card (Raspberry Pi)
💡 This step applies to Raspberry Pi only. See Step 3 and Step 4a above for PC.
Raspberry Pi boots from an SD card. You'll need an SD card reader to flash the image (done in Step 2), and then insert the SD card directly into your Raspberry Pi.
Make sure your Raspberry Pi is powered off.
Insert the flashed SD card into the SD card slot on your Raspberry Pi.
Connect power to the Raspberry Pi — it will automatically boot from the SD card.
No BIOS configuration is required on Raspberry Pi.
Step 5 — Let It Flash Until the Computer Shuts Down (PC Only)
Once booted, ConnectedRoom OS will automatically begin flashing itself onto your device's internal storage. Do not interrupt this process.
The screen will display flashing progress. Some blue messages and errors. Let it run to completion.
When the installation is done, the computer will shut down automatically.
This is expected behavior — wait until the machine is fully powered off before proceeding.
Step 6 — Remove the USB Key or SD Card (PC Only)
Once the computer has fully shut down, remove the USB key or SD card from the port. Do not remove it before the shutdown is complete, or the installation may be incomplete.
Step 7 — Power On (PC Only)
With the USB key or SD card removed, press the power button to start the device. ConnectedRoom OS will now boot from the internal storage for the first time.
Step 8 — Connect to Wi-Fi
On first boot, ConnectedRoom OS will guide you through connecting to your Wi-Fi network.
Follow the on-screen instructions displayed on your device — the setup wizard will walk you through the process.
On your phone or another device, open Wi-Fi settings and connect to the network named "ConnectedRoom OS". This is a captive portal broadcast by your device.
A configuration page will open automatically once connected to the captive portal.
You'll see a list of available Wi-Fi networks — select yours from the list.
Enter your Wi-Fi password and confirm.
Once connected, your device will join your network and the captive portal will close. ConnectedRoom OS is now fully installed and online! 🎉